The Immigrant Table · Vinaya of Elaichi Patisserie

Mumbai, India → France → Canada
French pastry shaped by memory, longing, and the flavours of home.

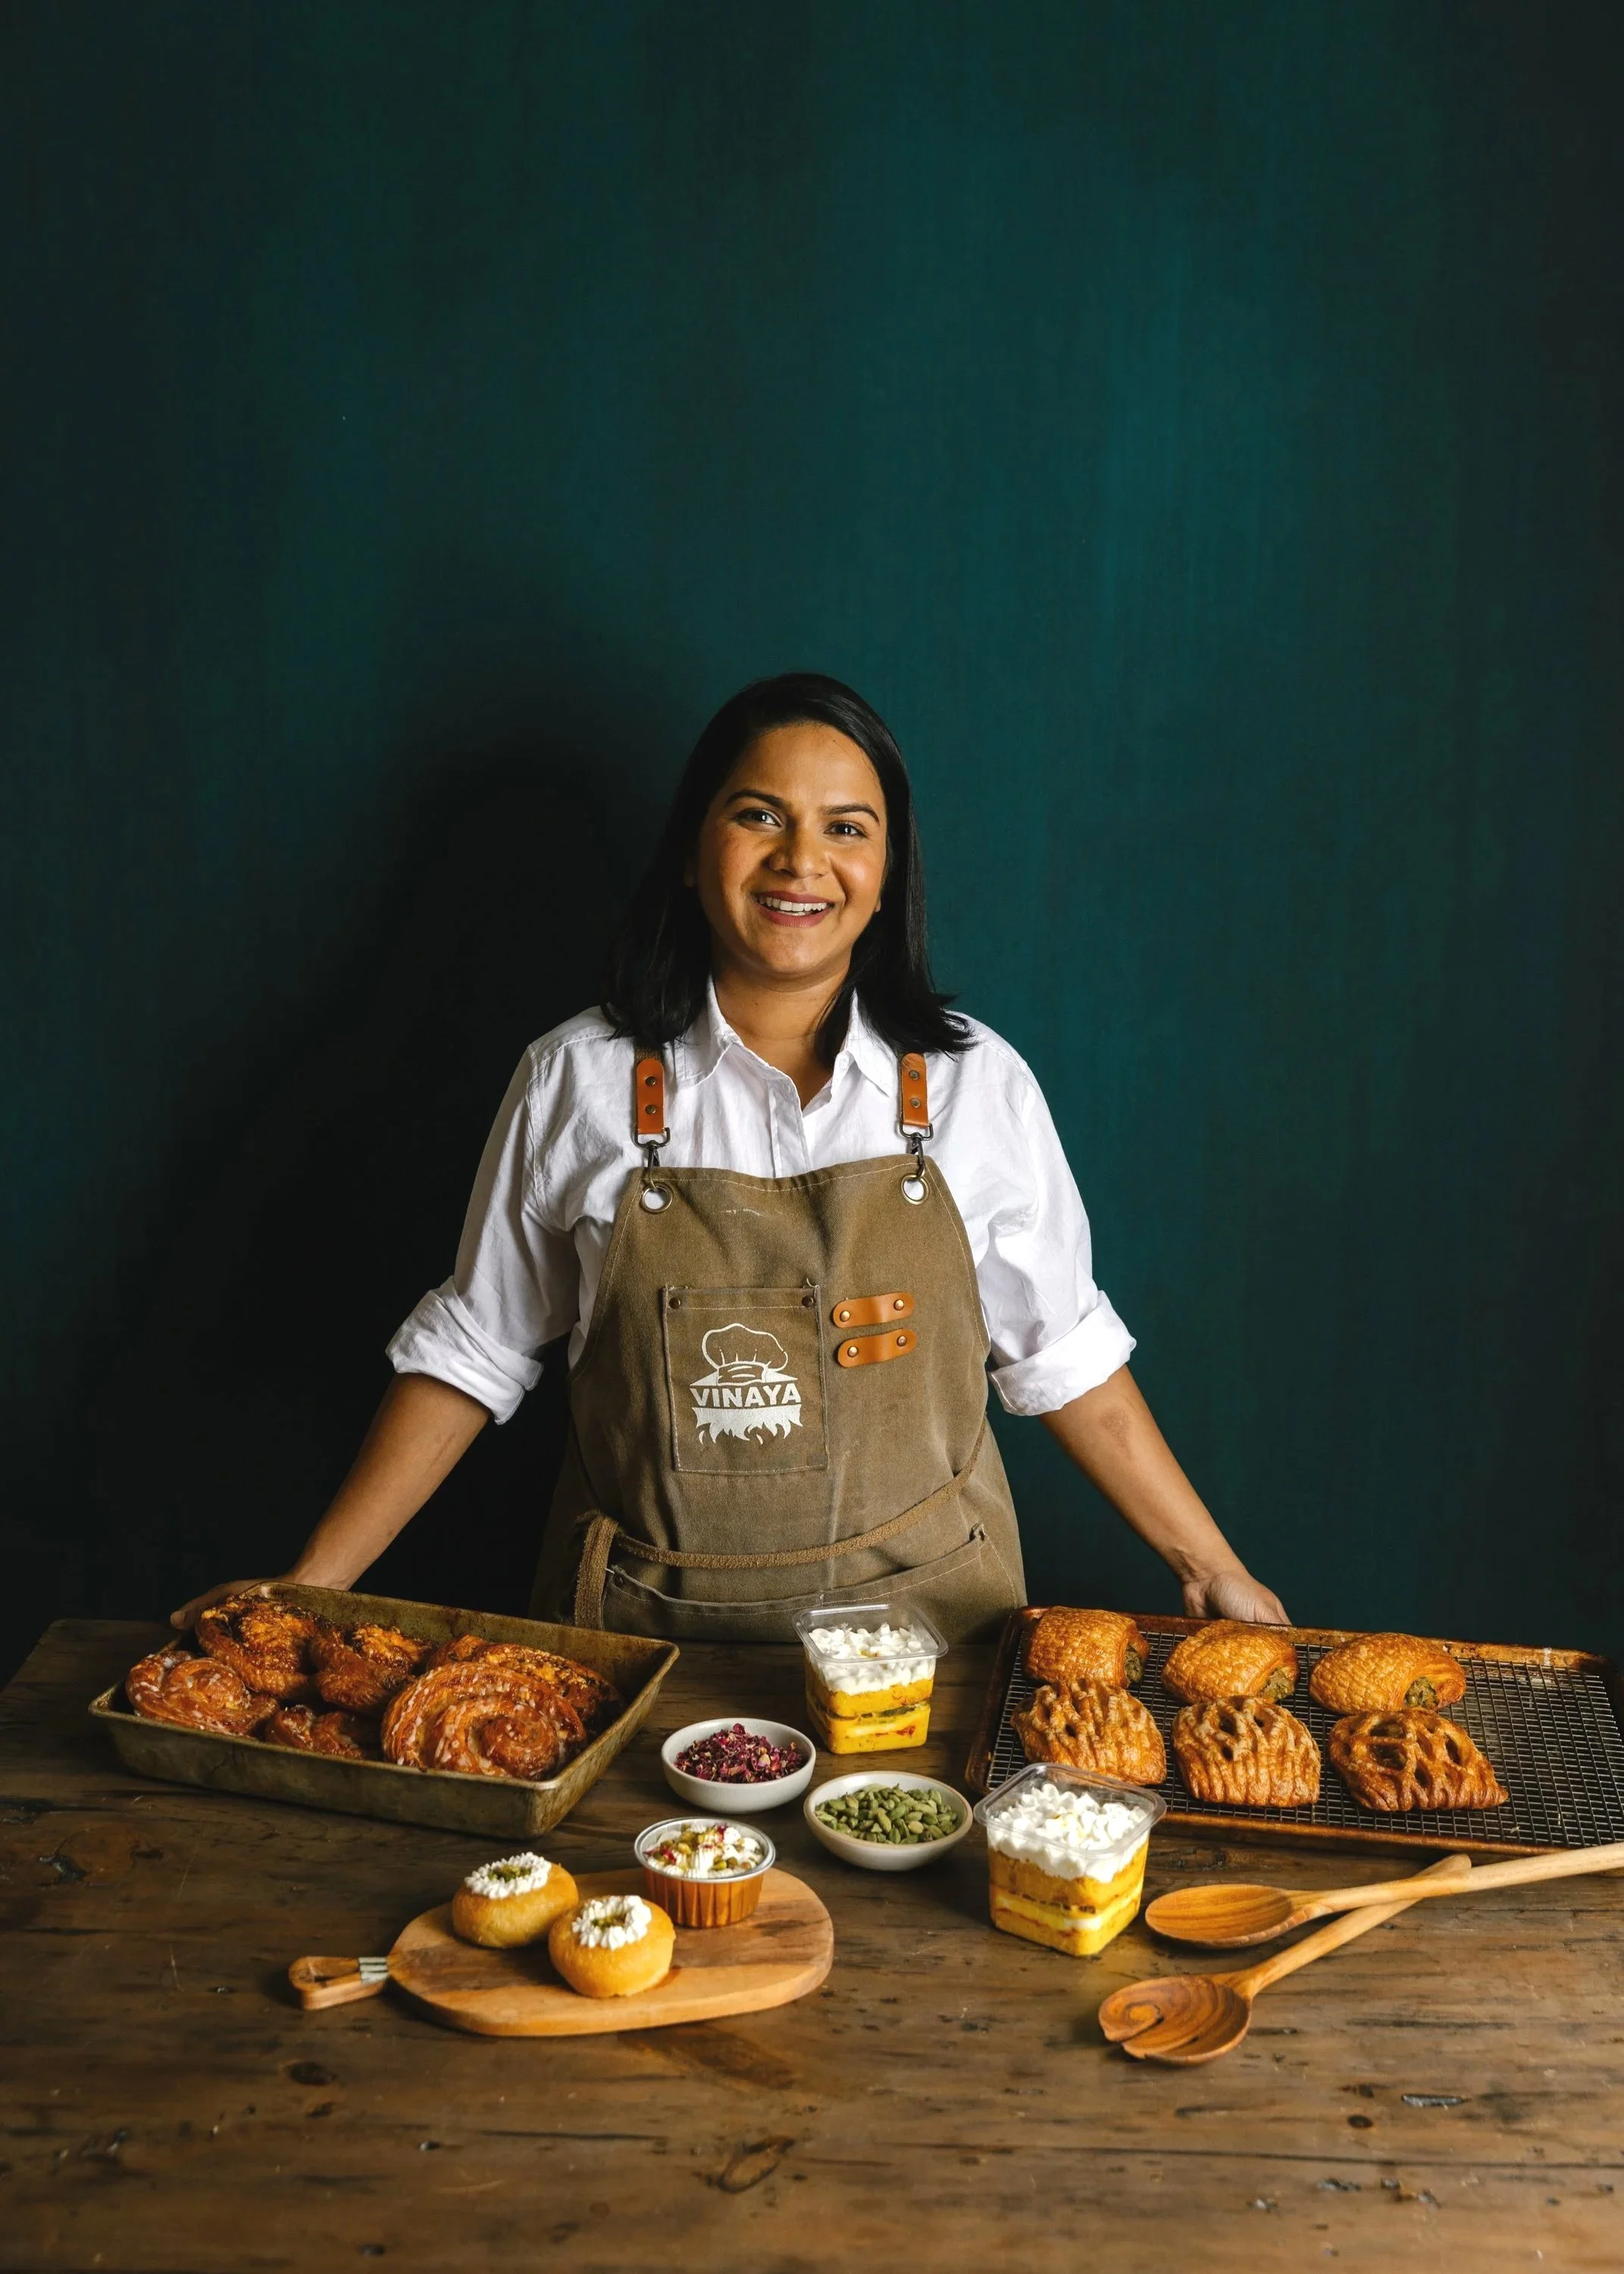
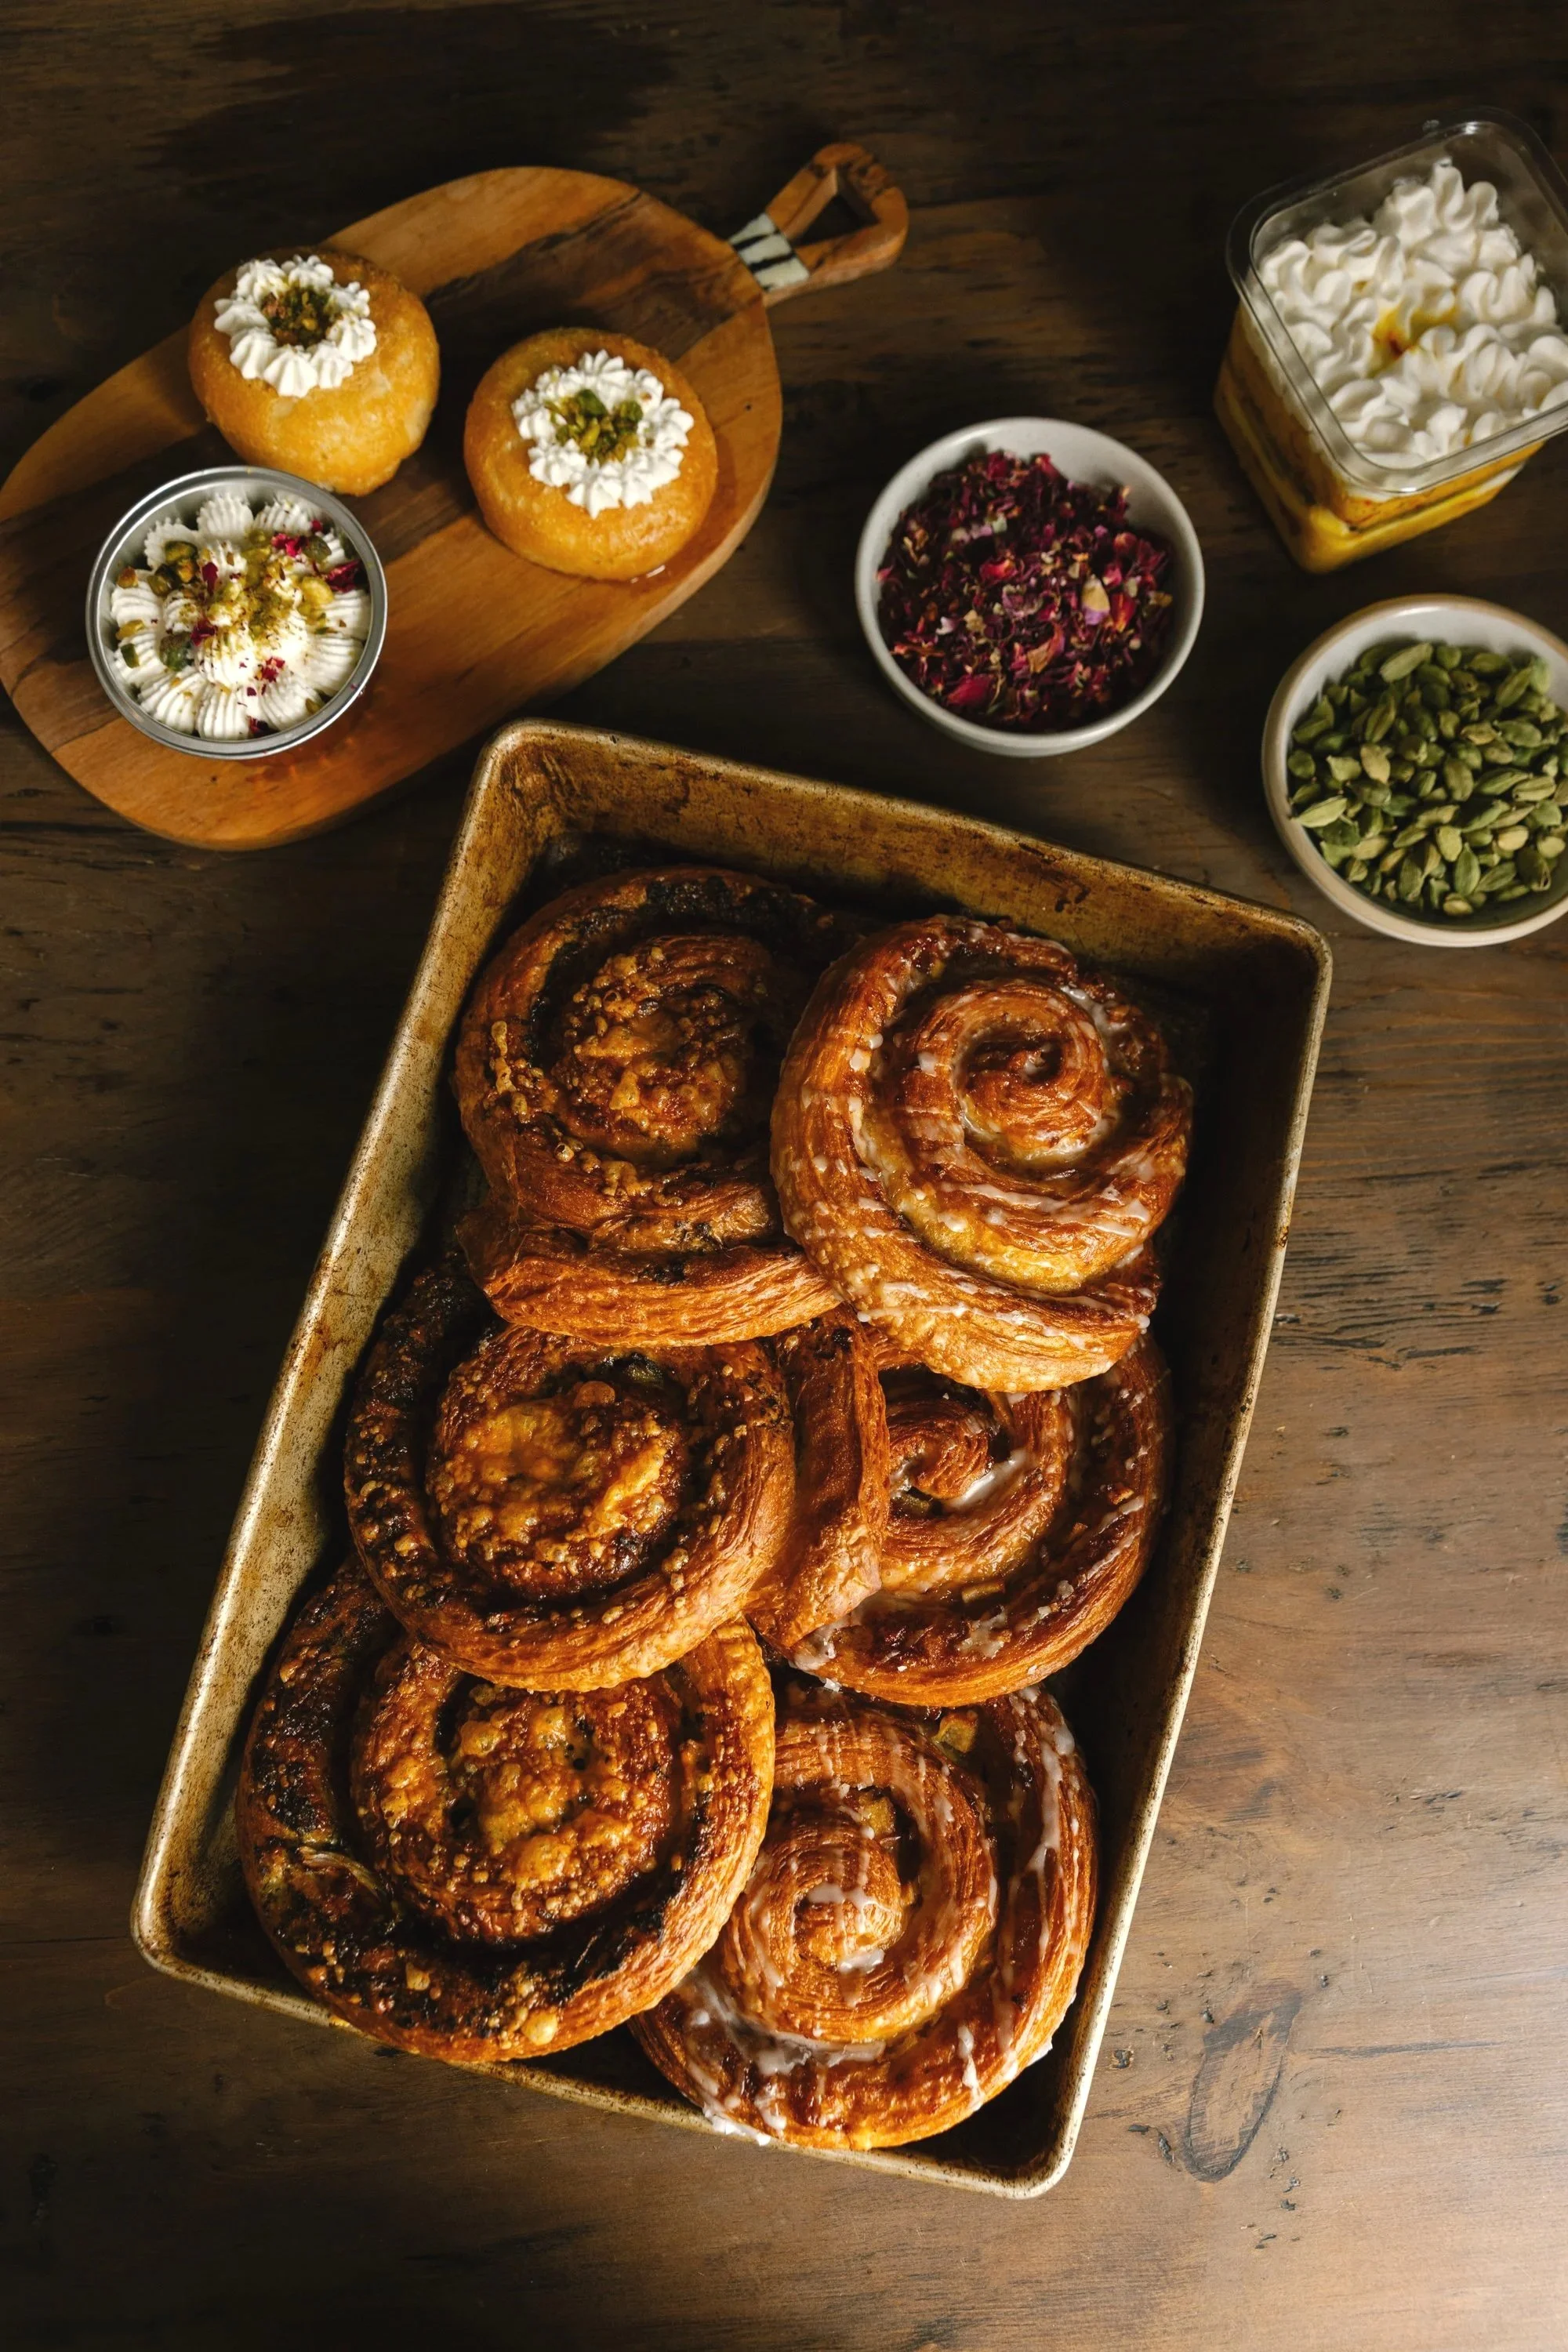
At Elaichi Patisserie, Vinaya folds Indian flavours into French pastry — cardamom, saffron, chai, pistachio. Familiar flavours carried into something new.

“Elaichi” means cardamom in Hindi — a spice she describes as the vanilla of Indian cooking. Tiny, but essential. Present in desserts, curries, chai, and everyday home cooking across India. When she began building the bakery, the name felt natural: a way of connecting the pastries she trained to make in France with the flavours she grew up with in Mumbai.

Before pastry, Vinaya worked in engineering and corporate management in Mumbai. But after years of long commutes and office work, she realized the kitchen was the only place she genuinely felt happy. She began taking pastry classes on weekends before eventually leaving her job entirely and moving to France to study pastry during the pandemic.

Later, she arrived in Canada on PR and eventually found her way to Vancouver, taking whatever opportunities she could find during COVID while trying to break into the pastry industry as a newcomer.

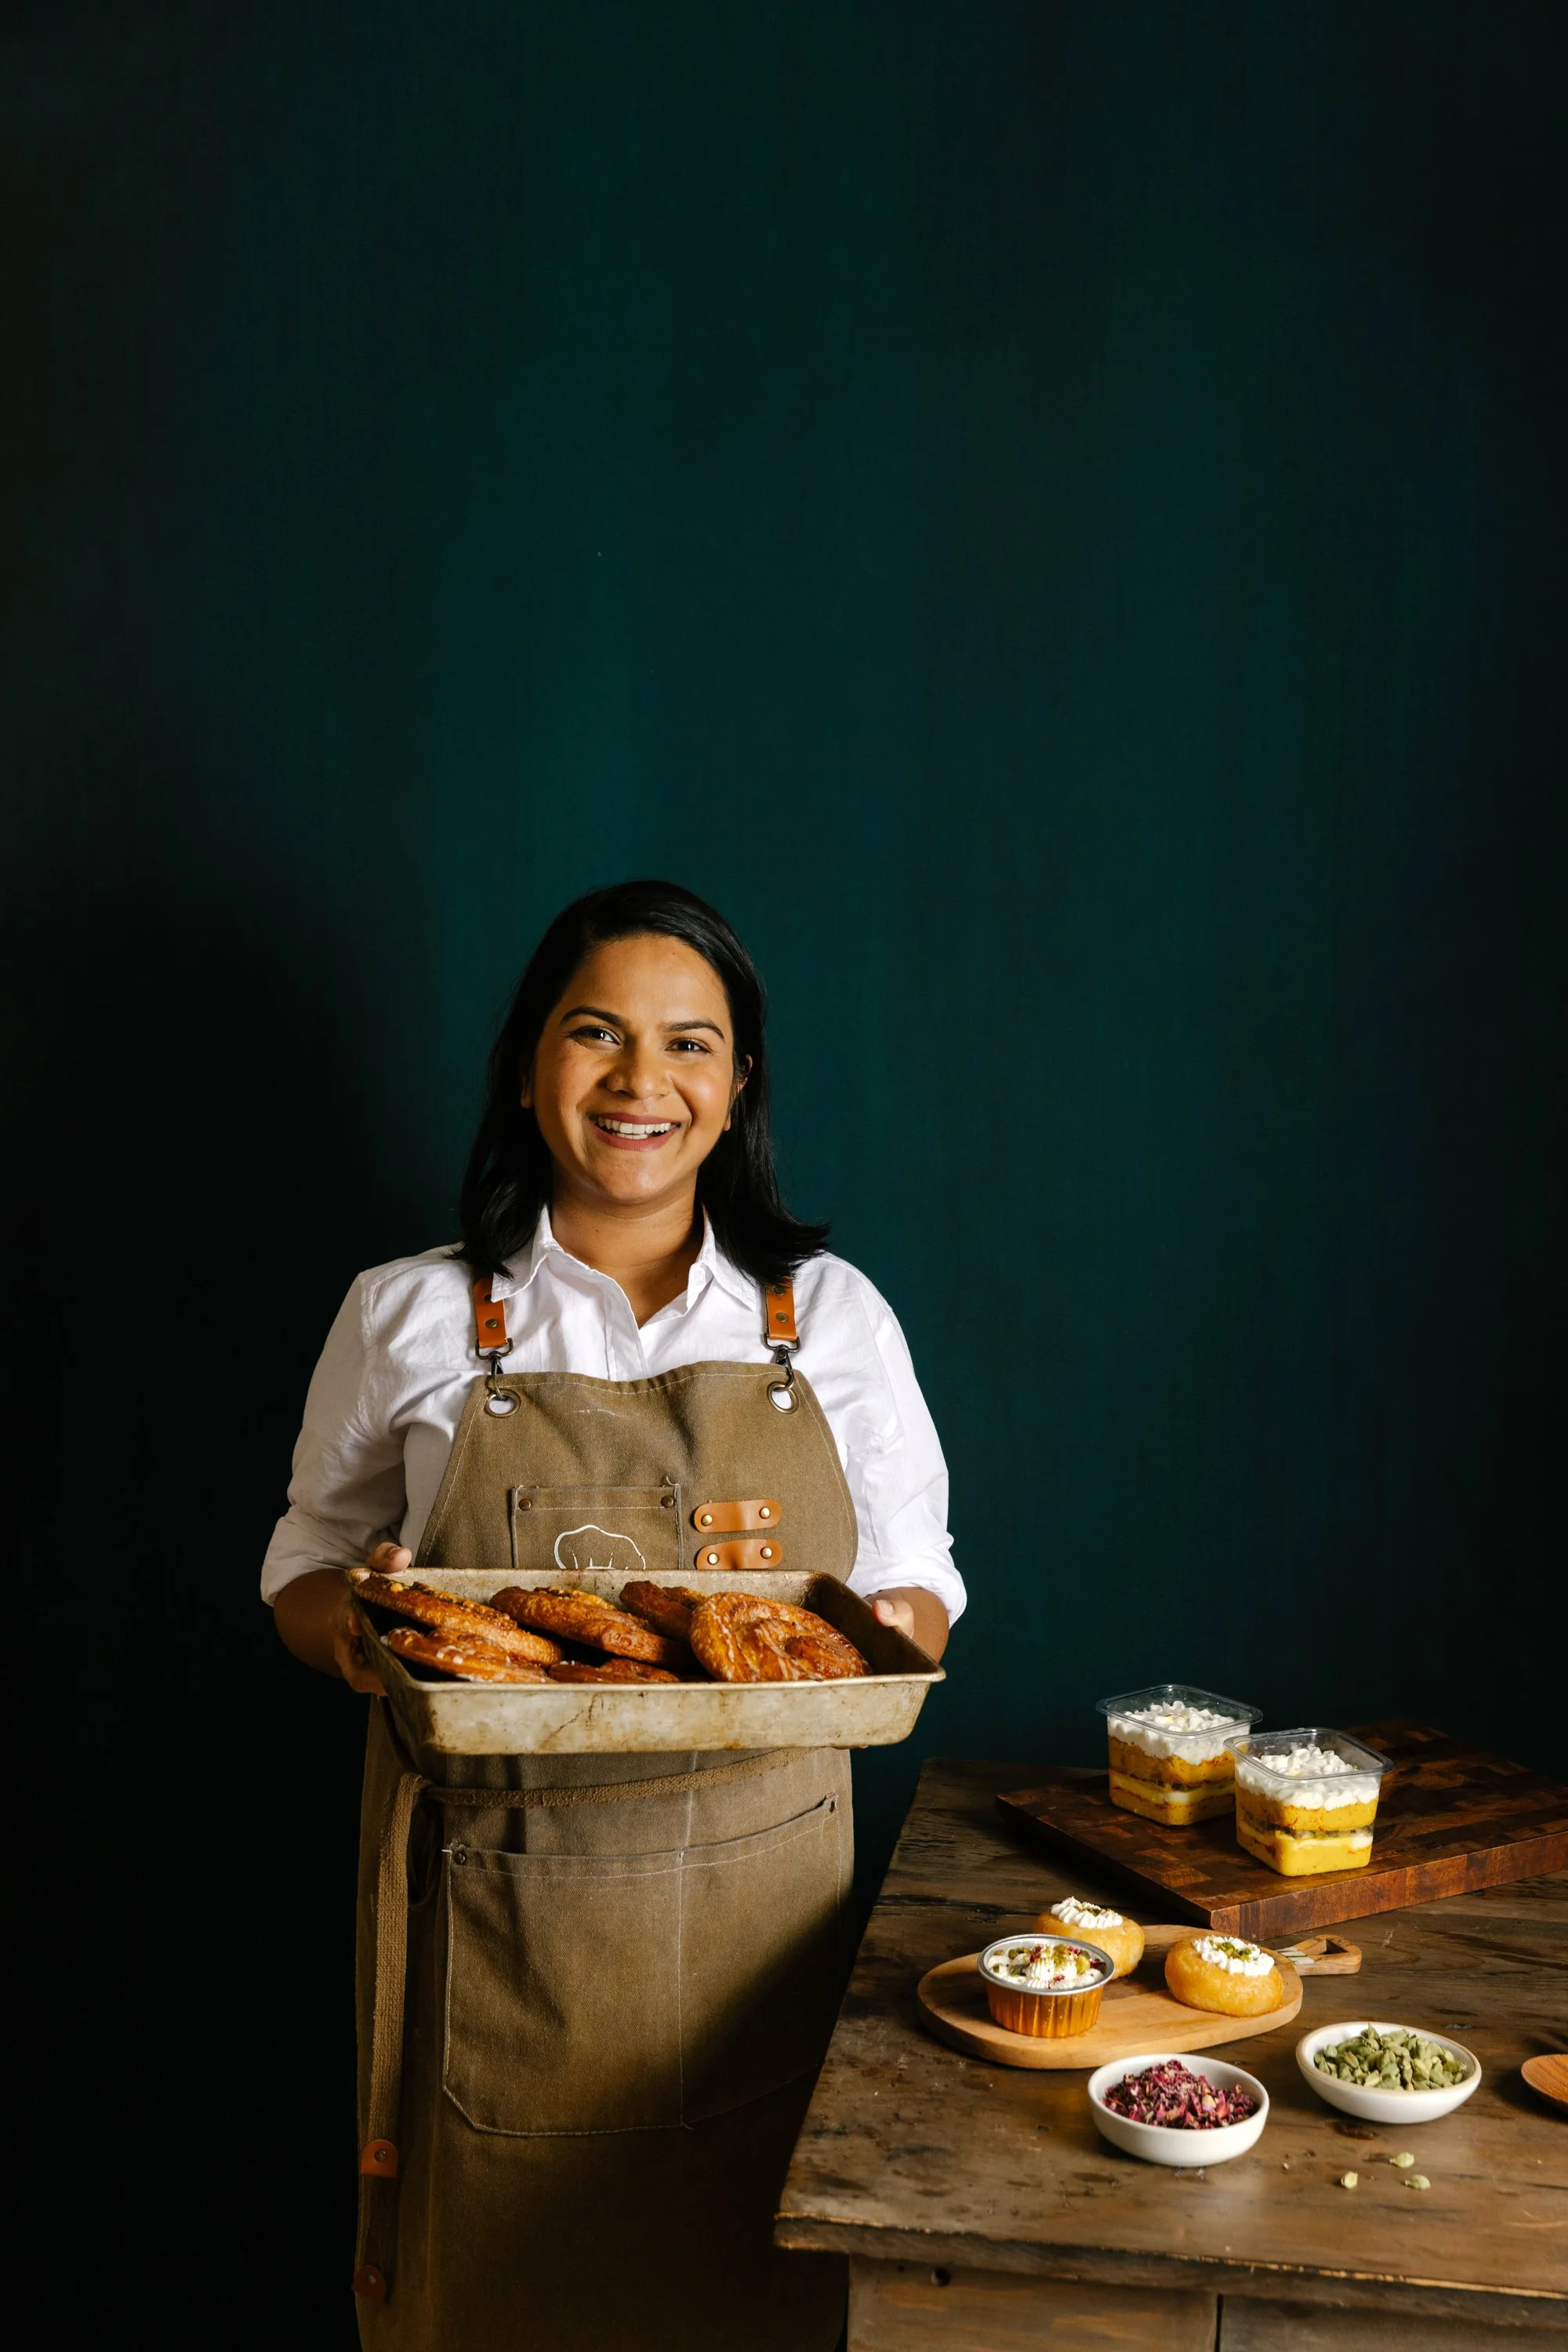
A lot of the bakery’s flavours were born during pregnancy. Stuck at home during COVID, far from India and unable to travel easily, she found herself craving the foods she missed growing up — especially street foods and savoury bakery snacks. So she started recreating them through pastry: masala brioche, samosa croissants, chai-spiced pastries, pistachio saffron cakes.

What stayed with me most was hearing how instinctively food carried her back home. The flavours weren’t created from a business plan first — they came from craving, nostalgia, memory, and the desire to hold onto something familiar while building a life somewhere completely new.

She spoke honestly about how exhausting it has been to build the business while raising a young daughter — early mornings, long market days, balancing childcare and production, figuring things out as immigrants without family nearby most of the year. But this year has also become a turning point: Elaichi has grown enough to hire help and become self-sustaining while she prepares for another baby.

There was something very moving about hearing her talk about that growth — not just as a business milestone, but as relief. The possibility of finally being able to pause for a moment and care for herself and her family while the business continues standing on its own.

Photographing Vinaya fel like witnessing someone slowly build a new version of home through food, memory, and persistence.

Steamed Bun Dough

Proofed dough with honeycomb textures

This steamed bun dough recipe makes 16 buns. You can halve or double the recipe, just keep an eye on the texture. The dough should feel soft and malleable, add more water if it’s too tough or flour if it’s too sticky. Add vegetable oil to your hands while working with the dough. It’ll ensure smooth and shiny buns.

I highly recommend using a scale for this recipe. Keep in mind that various flours will absorb water differently. Making good steamed buns come with time and experience. You’ll know how to “read” and work with the dough in time.

If you live in a colder climate like Canada — I like to rise the dough with a plate of hot water in the oven. It speeds up the process from 2 hours to 25 minutes. You’ll know the dough is ready when it expands 1-2 times in size. Honeycomb textures will appear when you pull the dough apart (see photo above).

Steamed Bun Dough

Makes 16 buns

INGREDIENTS

  • 1 cup (236 g) of lukewarm water

  • 1 tbsp (12 g) cane sugar

  • 2 tsp (5 g) active dry yeast*

  • 3 cups (420 g) all-purpose flour, plus extra for kneading and rolling*

  • 1/2 tsp (3 g) salt

  • 1 tsp (4 g) baking powder

  • 1 tsp (5 g) vegetable oil, plus extra for coating the bowl

INSTRUCTIONS

  1. Making the dough: In a small bowl, add the yeast, warm water, and sugar and stir to dissolve. Let sit for a few minutes to activate the yeast. The liquid should foam and look creamy. If not, your yeast is dead and you’ll have to try again.

  2. First Kneading: In a large mixing bowl, add the flour and make a well in the center. Sprinkle the baking powder around the outer ridges of the bowl so it will incorporate later. Gradually stream in the yeast mixture to the flour, mixing with a pair of chopsticks as you go. The dough should come together into a loose mound. When there are no dry patches left, add the vegetable oil and knead for 10 minutes. You’ll know that the dough is ready when it has “Three Shines or 三光” — Shiny hands, bowl, and dough. The dough should be smooth and soft like a baby's bottom.  If the dough is too sticky, add flour or vegetable oil. If the dough is too tough, add water to your hands and continue kneading. 

  3. First rising*: Place the kneaded dough in a well-oiled bowl. Cover and let sit in a warm spot for 1-2 hours until it has doubled in size. The time will depend on the temperature in your home so keep an eye on it. To check if the dough is ready — pull the dough away from the edge of the bowl. There should be strands of airy, honeycomb-like textures. 

  4. Second Kneading: Using well-oiled hands, transfer the risen dough onto a pastry board. Knead vigorously for 8-10 minutes, popping as many air bubbles as you can. This will ensure smooth and shiny buns.

  5. Prepping the dough: Halve, and divide the dough into 16 morsels. I use a scale to ensure even portions. Knead each morsel into a sphere and flour generously to prevent sticking. Cover the dough morsels while you work so they don’t dry out. 

  6. Rolling the wrapper: Flour your surface and flatten a morsel of dough with your palm. Using a rolling pin, roll the dough from the edge towards the center, without actually rolling the center of the dough. You want a thick center and thin edges on your wrapper. The wrapper should be 4-5 inches in diameter. Cover the wrappers while you work.

Cooking Tips:

  1. If you are using instant yeast, substitute the same amount, skip the proofing step, and add the yeast directly to the dry ingredients. 

  2. For tender, softer buns — use 280 grams of all-purpose flour and 140 grams of cake flour. The dough will be less chewy and softer to work with.

  3. To speed up the rising process. Cover your dough and place it in the oven with a plate of boiling water underneath. The temperature should be around 38 C/100 F. The dough should be ready in around 25-30 minutes.